A DIY series stepped attenuator (1)
Stepped attenuators are ready available and come in two different kinds:
Series stepped attenuator.
Here are the resistors mounted in series. In using a switch a postition between
these resistors is chosen which determines the total attenuation. Disadvantage
is that all resistors used are "in signal" (to ground).
Ladder stepped attenuator.
This one owes his name to the schematic as drawn: looks like a ladder... Here
for each step of attenuation a voltage divider is chosen consisting of 2 resistors,
so only 2 resistors in "signal". Disadvantage of the "ladder"
is it's size: 4 decks, each 24 steps and thus requiring twice the amount of
resistors.
I've built both of them and my conclusion is that sonical differences between them are minimal. The BIG improvement is upgrading from a "normal pot" to a stepped attenuator, no matter if the pot is Noble or Alps aso.. Is only the best good enough, and space is no problem, then I recommend building a ladder right from the start. This to spare you the materials end efforts if you are not sure which one to choose. There is one thing a ladder and series have in common: they're expensive!! I hope to spare you some money in showing how one is easily made yourself!
I picked the series because of the lack of space since it is to be mounted in my nearly finished headphone amplifier. The switches being used are bought at a ham-radio flea-market. They are second-hand, but are made out of good materials and if cleaned up, can be as good or maybe better than Elna's. This because of the higher pressure being made by the switch selector. I you cannot find such switches, Elna may be the way to go...
Click here to see the schematic and resistor values. By the way, this is the same schematic as in "Tips and Tricks".
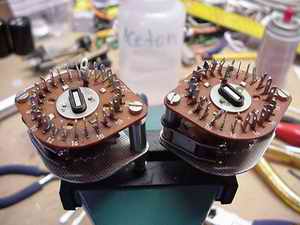 |
The
switches. The one on the left is already cleaned up. It will
ease up mounting the resistors as the eye-lets are clean and
open. Remove all old solder and clean up the residuals from
soldering (black spots). |
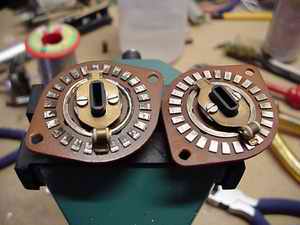 |
Two
decks. Dirty? Probably... some switches have special grease
on them, which is not to be removed (like Daven). If you are
not sure: Clean it up! I use aceton, ethanol will also do fine. |
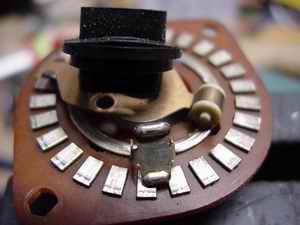 |
The
switch selector has to be cleaned up also. As you can see, not
the whole construction is the conductor, only the little contact
in the foreground... Don't forget to use a spray like Contact
to grease and protect your clean contacts! |
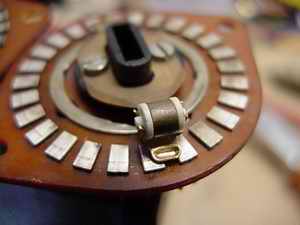 |
This
picture clearly shows the type of switch to be used: the upcoming
contact should be made before the previous is broken. IMPORTANT! |
 |
The
actual mechanism. By stretching the spring the switch will rotate
much easier thus preventing any audible clicks on the chassis
and, worse, clicks audible in the line stage (microphonics). |
_______________