Upgrading an audio rack
 Audio-racks
are available in many forms and prizes. Mostly an audio-rack will be something
that is bought "at the end of the ride", I mean, it is just more fun
spending your money in cd-players and/or other equipment.. The price of an audio-rack
is often very high and many of us will start out with a custom made "book-shelf"
type that eventually will remain for a couple of years... However an audio-rack
can be as much an upgrade in sound as new interlinks, for instance!
Audio-racks
are available in many forms and prizes. Mostly an audio-rack will be something
that is bought "at the end of the ride", I mean, it is just more fun
spending your money in cd-players and/or other equipment.. The price of an audio-rack
is often very high and many of us will start out with a custom made "book-shelf"
type that eventually will remain for a couple of years... However an audio-rack
can be as much an upgrade in sound as new interlinks, for instance!
I
spend many years listening to music with all the equipment on a custom-made
pine closet, because my subwoofer fitted in so nicely in... Later on I swapped
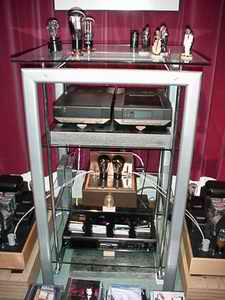
this closet for a rack, bought at a furniture market at sales-week. It's a dual
frame metal rack with glass shelves. The outer metal tubing is hollow which
I filled up with lead. Further on I just placed the equipment and it l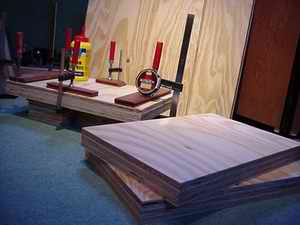 ooked
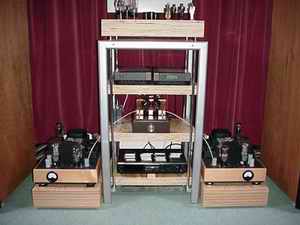
much better! Since then my power amplifiers are placed on 6 layers of underlayment
(spruce plywood for floor making) which are glued together. This sounded even
better than placing the power amps on the concrete floor! This idea came from
my friend Hans Kortenbach which had it from Salabert (PHY-HP). Later on another
friend om my, Cees Piet, placed is his installation on an underground of the
same construction and thought of it as a big upgrade! So, up to the DIY-shop
to get me some!
ooked
much better! Since then my power amplifiers are placed on 6 layers of underlayment
(spruce plywood for floor making) which are glued together. This sounded even
better than placing the power amps on the concrete floor! This idea came from
my friend Hans Kortenbach which had it from Salabert (PHY-HP). Later on another
friend om my, Cees Piet, placed is his installation on an underground of the
same construction and thought of it as a big upgrade! So, up to the DIY-shop
to get me some!
Plan
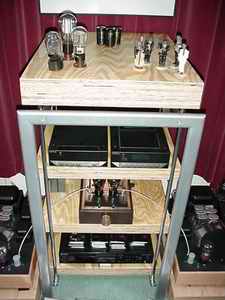
is to replace the glass shelves by three layers of underlayment, on top 5 layers
for my record-player (later on). These layers are to be glued together to make
it "like one". Best used is normal white wood-glue here. You'll need
lots of it! Just poor it on a layer and use a paint brush in smearing it out.
When put together, put some small metal flakes between the layers to fix position.
If you don't do this, the layers will slide off position when pinched together..
Don not glue more than three layers at once: the glue will dry up because of
time needed to smear out the glue. It will be dry in hour anyway, so you can
go on quickly. If ready, use sandpaper to smoothen up the sides and sufaces
and then it is ready to finish off. I used furniture wax here. When applied
the only thing left is polishing and it will ready for use. Since it is only
used indoors, wax will do fine as protection!
Better sound? Yes! Aesthetically better? Nothing so personal as taste... The sound however is more colourfull, has more body and there is a bigger soundstage... Because of the quality of this underground, equipment is better coupled to, in stead of decoupled from the shelves! (that is: if using tip-toes; pin facing up). How is this possible? Target always seemed to be the way to go... I don't know, all I care about is, that this is a cost effective manner to upgrade your audio-rack!
ps. The use of underlayment (plyed-spruce) is necessary, normal ply-wood does not do the trick! Using MDF will be disappointing too...
_______________